
Tips and tricks to prepare your soil for frutiful outcomes
By Sandi Pullman
The right time
The best time to prepare your soil and plant fruit depends on where you live. Australia is a large continent that can be divided into several different climate zones. In the cool and temperature regions, early autumn is the best time to plant citrus and potted fruit trees as the soil temperature is still warm, which helps the root system become established before winter sets in. For barerooted fruit trees that are only available in the southern half of Australia, the best time to plant is late winter to very early spring. In the tropics, the best time for citrus and other fruit trees is in the dry season, from May to September.
Soil requirements
Compared with the rest of the world, our soils are old, thin and low in nutrients. Our native plants have adapted to these conditions but other plants tend to want more from the soil. It’s important when choosing plants to know what their soil requirements are so you can improve your soil to suit their needs. Fruit trees and citrus need an enriched soil that has good structure, meaning it drains well, oxygen is present and there are lots of nutrients available. There are three types of soil: sand, clay and silt. All three have their good and bad points. Sandy soil is easy to work with and has lots of oxygen but has poor structure and doesn’t hold moisture or nutrients. Silt can contain lots of nutrients and be a fantastic soil but it can also be quite terrible depending on what has washed down the river. Clay has lots of nutrients and good structure but heavy clay can be airless and almost impossible to work with.
To improve the structure of all these soils, you need to incorporate lots of organic matter, such as compost, animal manures and blood and bone. To improve large areas of clay soil you may have to initially rip it to break up the clods. Never do this when the soil is wet or too dry as it destroys the existing structure. Then, using a rotary hoe or the more difficult hand method, dig in lots of gypsum and organic matter. A word of advice: rotary hoeing can create a hard pan underneath the soil that impedes drainage, so it’s better to use the ripping method to open up the soil. Rippers and rotary hoes are available for hire from equipment hire stores. Gypsum is one of the magic ingredients that improve clay soil. It is a mineral and a form of calcium. When it’s mixed in, it reacts with the clay particles, causing them to separate from each other and create crumb structures. These crumbs allow the oxygen to penetrate and the water to drain away. They also allow important creatures such as worms to move more freely, adding their castings throughout the soil. Gypsum does have its limitations, though. It will be at least three years before you will see any real improvement and for it to be effective it needs to be applied annually. It also does not work on high-sodic soils —soils that have high amounts of sodium. It’s also not advisable to use gypsum if your soil pH is below 5.5 as it can kill plant roots.
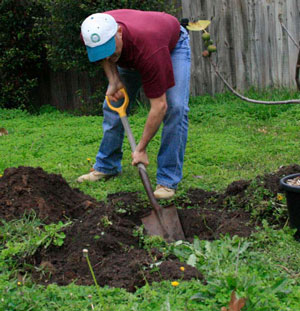
Digging the hole
Most people believe they need to dig a deep hole but this is not true. The hole needs to wide rather than deep because most plant roots grow laterally rather than vertically. It’s recommended that you dig a square hole, especially in clay soils, as the smooth sides of a round hole tend to make the roots grow around themselves and become rootbound. Square holes stop this, forcing them to grow out sideways and anchoring the tree securely. Adding compost and animal manures to the base of the hole aren’t always the best ideas because:
1. Organic matter decomposes, causing the plant to sink deeper into the hole.
2. It absorbs the water, holding onto it and preventing the roots from accessing it.
3. Strong fertilisers can burn the white feeder roots, thus killing the plant. If you have prepared you soil properly, you shouldn’t have to add anything else except some mulch on top.
Planting the tree
The best part of gardening is the planting but it’s important to get it right. Many trees die because they are planted either too deep or not deep enough. If the rootball is too high out of the soil, the roots will dry out and the plant will die. If the rootball is too far in, the trunk will rot and the plant will suffer. The correct depth is where the stem meets the roots at exactly ground level. Once you have the depth right, backfill the hole with the soil you dug out and water in with some liquid seaweed fertiliser. When planting bare-rooted stock it’s a good idea to soak the roots in water with some liquid seaweed fertiliser for about 1–2 hours. This will help them get over their transplant shock. In the hole, make a mound of soil and carefully place the tree roots over the mound. Then gently start backfilling, making sure you poke the soil into all the nooks and crannies, getting rid of as many air pockets as you can. Water them in well.
Staking it
There are two schools of thought: those who like staking and those who don’t. Staking, however, prevents trees from establishing a good root system. Once the tree has established new roots into the soil, a little swaying in the wind helps the tree get a firmer grip on the soil; staking prevents this from happening. So if you are going to stake, make sure you leave the stake no longer than six months and tie it in a figure of eight to allow the trunk to sway a little. If you understand the requirements of the species you are planting and prepare your soil accordingly before you plant, you will create a healthy environment for your tree to establish itself and flourish. You won’t need as much water or fertiliser and over the years this will save you time and money.
Tip: If heavy clay is one of your problems, one way around it is to create raised beds. The benefit of these is that it lifts the roots away from the heavy airless soil below. Buy a good-quality loam — one that has some clay in it — and add lots of organic matter.


