A step-by-step guide on how to install a fence that looks good and meets safety standards.
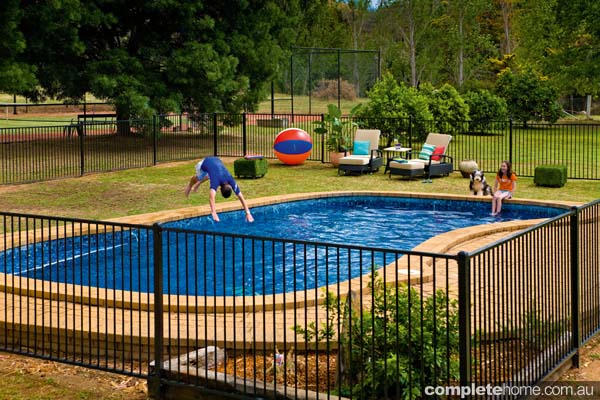
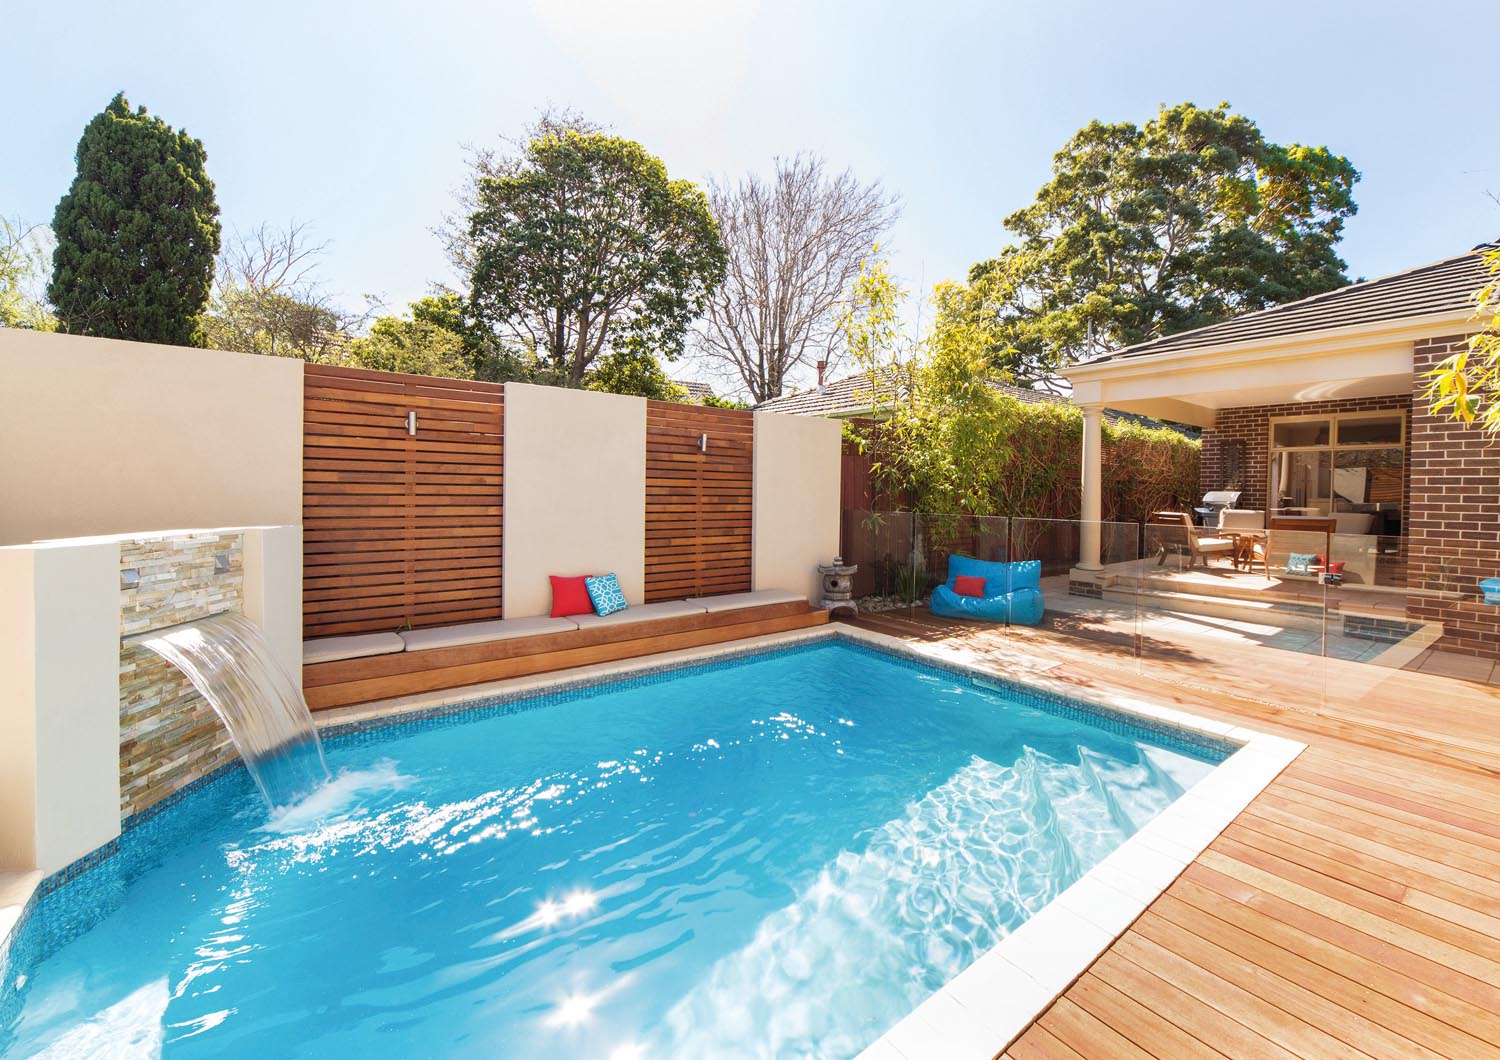
There are safety standards for backyard pools, with most focusing on keeping the area child-friendly. Legally a pool shouldn’t be filled until a surrounding fence with a self-closing gate is installed. So, it is important to check with your local council about boundary requirements before installation.
Before setting out call “Dial before you Dig” on 1100, this is a free service that tells you what pipes and cables are under your backyard.
When purchasing a fence, most pool fencing is made of coloured powder-coated aluminium, with vertical rails spaced no more than 100mm apart and horizontal rails spaced at least 900mm apart. To calculate what to buy, mark out the site and indicate the posts at 2.5m apart (this is based on 1 x panel and 1 x post) with an extra post at each change of direction.
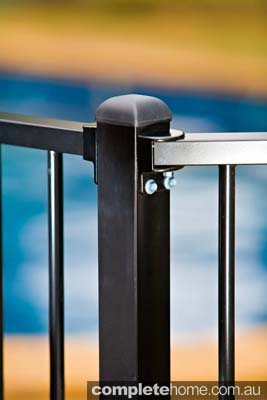
There are two types of posts available at Bunnings Warehouse off the shelf: Flange Post, which is designed to be bolted to an existing concrete slab, and Standard Post, which is required to be concreted into the ground.
For every panel you will require one four-pack of panel brackets and one post, with an extra post to finish the run. For every gate you will require one G8 Safe gate kit and one 2100mm-high post to mount the pool latch too. When fencing down a slope you can only step your panels a maximum of 100mm.
For panels that need to run on a rake (the panel running parallel to the slope), go to the special orders counter at your local Bunnings.
Material Checklist
* 1800h Posts or 1300h Flanged Post
* 2100h Posts or 1600h Flanged Post
* Panels
* Panel Brackets
* Gates
* G8 Safe Gate Kit
* Solar Light
Price: DIY from $3889.46 (based on 70 lineal meters of fencing from Bunnings Warehouse)
Skill Level: Three
Time: Three Days
Step one
Set the stringline and clear the area of all foliage.
Step two
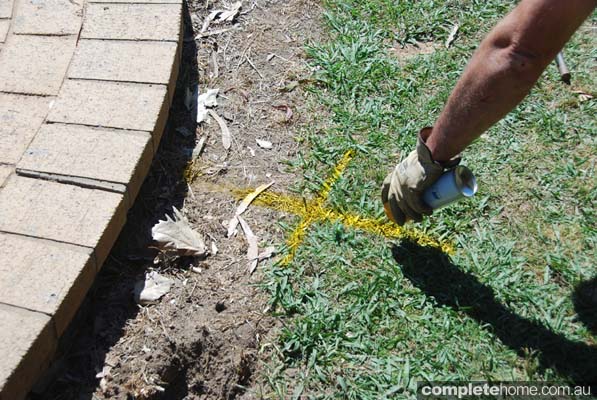
Mark out the post holes required at 2.5m. This will account for one panel and one post. At the end panel you will need to mark for one more post in order to finish the run.
Step three
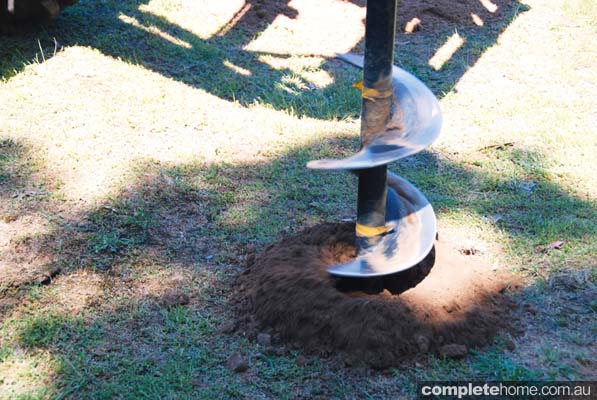
Dig holes at 200mm diameter by 600mm deep using a power auger or post hole digger.
Step four
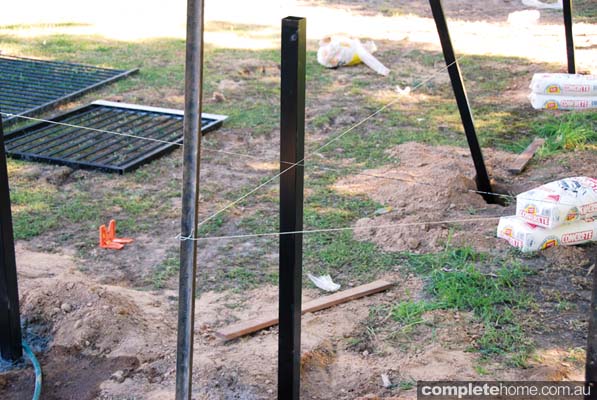
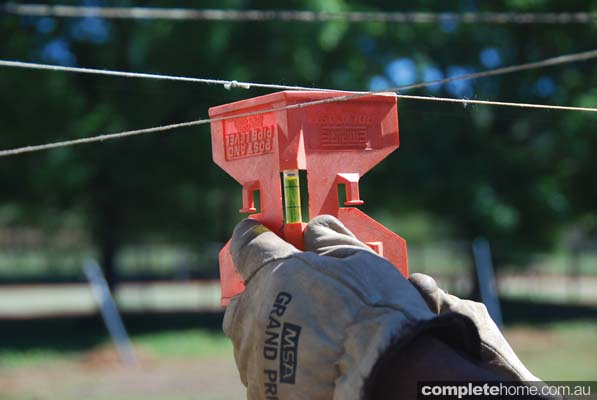
To get the post heights, set a stringline for the top of posts, allowing up to 100mm under and 50mm above the panel, with the latch post extending 300mm above the gate.
Step five

Using a panel to position your posts, fill the holes with concrete mix, sloping the surface for runoff.
Step six
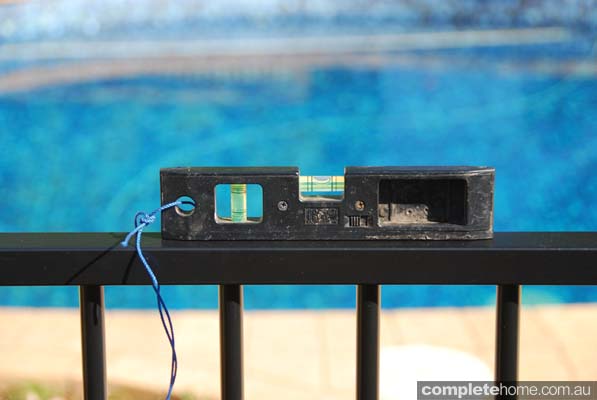
Once the concrete has gone off, rest the panel on temporary blocks and check with a spirit level.
Step seven
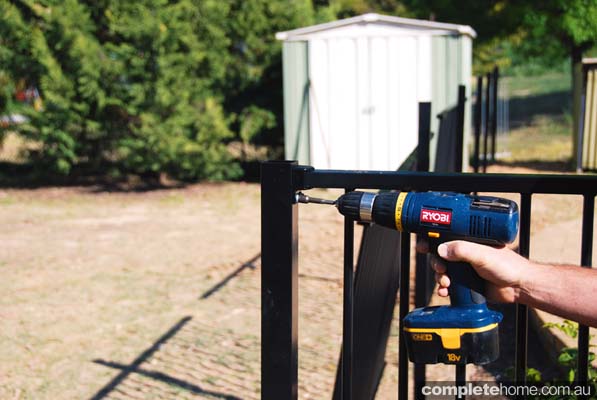
Slide the panel brackets over the top and bottom rails then secure with self-drilling Tek screws.
Step eight
If you have a steep yard you can step your panels down the slope. Pool fencing can only be stepped a maximum of 100mm. If your slope is too steep for this, go to the special orders counter at your local Bunnings to discuss options for a raked panel.
Step nine
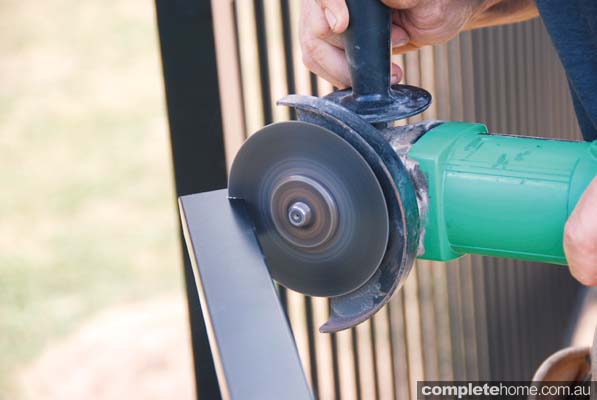
To change the direction of the fencing, angle cut the panel rails using a small angle grinder with a cut-off wheel or a hacksaw, then touch up the ends with spray paint.
Step ten
Cut the side wall of the panel bracket at the top and bottom with an angle grinder and score the side wall between the cuts. Then, using a pair of pliers, snap the side wall of the panel bracket off. Rest the panel on temporary blocks and check with a spirit level before fixing the panel bracket to the post with screws and fixing a screw though the bottom of the panel bracket up into the panel.
Step eleven
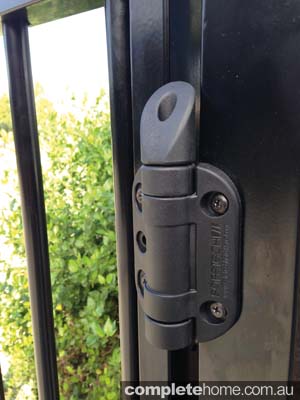
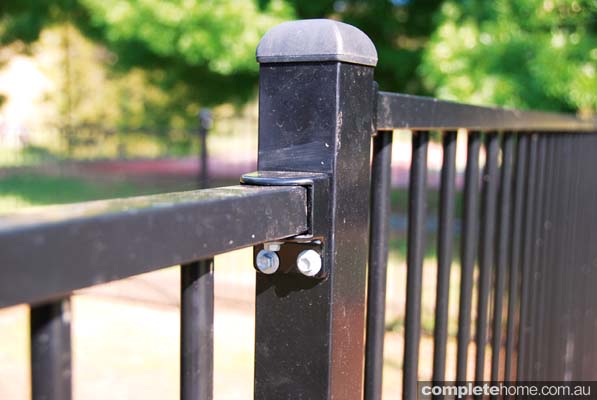
To hang the gate, attach the self-closing hinges to the outside of the gate (so the gate opens away from the pool area), 80mm from the top horizontal rail and level with the bottom horizontal rail using the self drilling Tek screws. Space the gate evenly, checking the level.
Step twelve
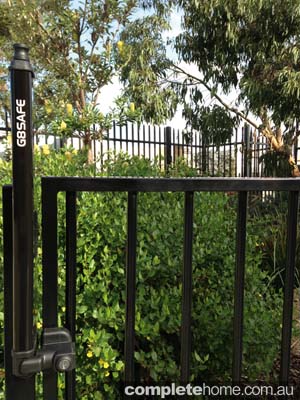
Attach the G8 Safe Latch to the 2100mm post, so the top of the latch is positioned 1500mm above ground level. When the gate has shut, fix the key lock assembly to the gate and adjust the key lock by the screw behind it. This will ensure the gate will lock into position when closed.
Fact Sheet
Bunnings Warehouse
Website www.bunnings.com.au
Originally from Poolside magazine, Volume 42


![Side view of a beautiful woman lying in the tropical pool .
[url=http://www.istockphoto.com/search/lightbox/9786750][img]http://img291.imageshack.us/img291/2613/summerc.jpg[/img][/url]](https://www.completehome.com.au/wp-content/uploads/2014/11/iStock_000016754965XLarge1.jpg)