Foods that cost a bomb can be inexpensive — and often very easy — to grow at home
If you’re budget-conscious when grocery shopping (and, let’s face it, who isn’t these days?), you’ve probably noticed some fruit and vegetables are pretty darn expensive. And, as Murphy’s Law would have it, it’s always the ones you want or crave that cost the most.
But, if you’re savvy about what you choose to grow, you can feed your family wonderful organic produce without the high pricetag. Here are a few of my favourites that can be expensive to buy (organically grown or not) so it’s well worth the savings if you can grow them yourself. The shorter season of some of these crops will encourage you to make preserves or pickles and become more aware of the seasonality of produce. You can’t get more local than freshly picked from your own backyard and you’ll also know exactly how it was grown.
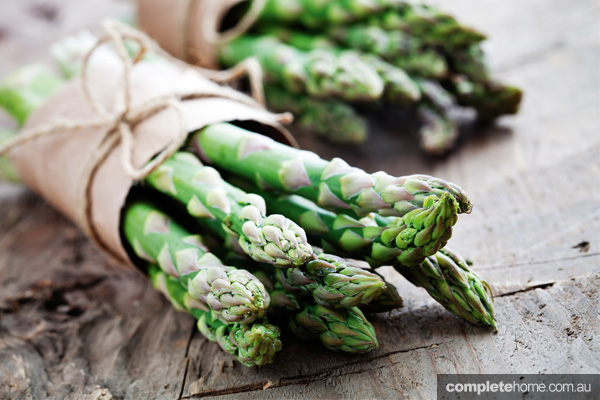
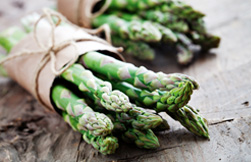
Asparagus
This is my favourite spring crop. Once established in your garden, it’s very easy to maintain and harvest.
I love the glut we have in spring and many spears get eaten raw on the way back to the kitchen. If I have too many to cope with, I swap them with friends or neighbours.
A bunch of organic asparagus can cost upwards of $6 and my pet hate is seeing out-of-season produce from Peru in the supermarket. So embrace this magnificent spring vegetable and grow your own.
Asparagus prefers a cooler climate but can be grown as a short-lived crop in the warmer and subtropical states.
Plant dormant asparagus crowns during winter in a full-sun or part-shade space that you’ve dug over well with manure and compost.
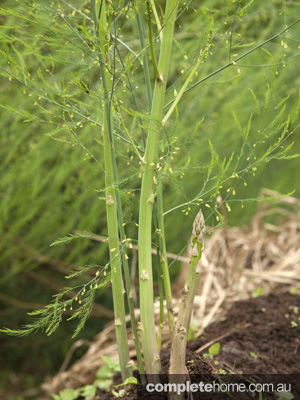
When choosing a site in your garden for asparagus, think long-term. It will take two to three years before a crown is producing edible spears and each crown will continue to produce in the ground for years before needing division. I’ve actually planted several crowns in a raised bed I created around the base of one of my nectarine trees and both the tree and the asparagus are flourishing.
The care and maintenance of asparagus plants couldn’t be simpler. Allow them to establish for the first two years without harvesting spears. (In the second year, you can take a few — just to remind you why you’re growing them — but leave the rest!)
Once established, the ferns will yellow/brown off in late winter. Cut them back to just above ground level and cover your asparagus bed with a layer of manure and straw mulch. Then wait for the magic to happen.
You should be harvesting spears for about six weeks during spring and into early summer, after which it’s time to leave the ferns to develop and the cycle begins again. No need to weed or stress about keeping the bed tidy again until late winter. What could be easier?!
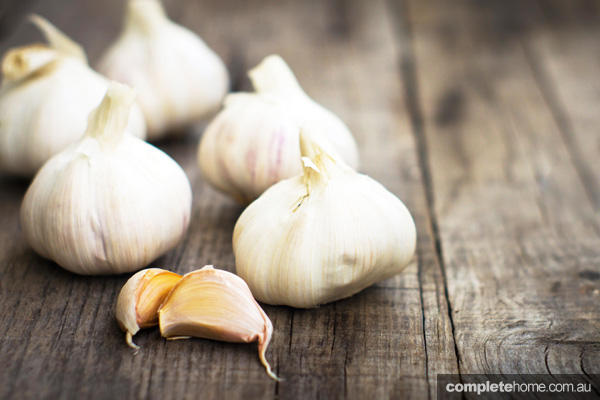
Garlic
Garlic is another favourite of mine to grow and eat. Growing garlic is particularly easy because, once planted, mulched and watered, it’s a pretty self-sufficient crop.
Thankfully, most pests don’t share my garlic obsession, so your crop will be relatively safe from attack. In the unlikely event that black aphids do infest your crop, treat organically with a spray of Eco-oil. Growing garlic is as simple as dividing up the cloves of a whole bulb and planting during autumn into a full-sun, well-drained and sweetened soil (add lime and compost).
Many garlic bulbs from supermarkets, particularly imported ones, have been sprayed with a chemical to stop them from shooting — don’t try growing these at home. Instead, look for healthy, plump bulbs at your local organic greengrocer or you can buy certified disease-free bulbs from nurseries such as Diggers Club.
Organic garlic can be $40–$50 a kilo. Last year I grew 4kg of garlic across two garden beds. Ka-ching!
My favourite varieties are:
• Mammoth Purple. As the name suggests, it produces large bulbs with big cloves.
• Early Purple. Ready for harvest in November/December, this is a mild garlic with large, purple-skinned cloves.
• Silverskin, a later-harvest variety, but it stores exceptionally well.
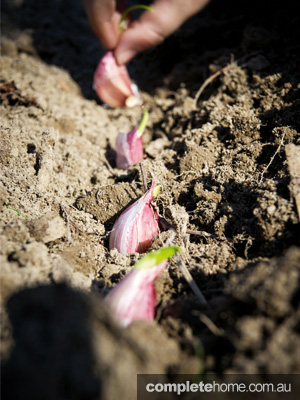
Money-saving tip: There’s no need to buy garlic bulbs every year; you can replant your own homegrown garlic from the previous season. Choose bulbs that have stored well and are firm, clean and disease-free. I prefer to plant only the larger cloves, saving the tiny ones on the inside of the bulb for eating.
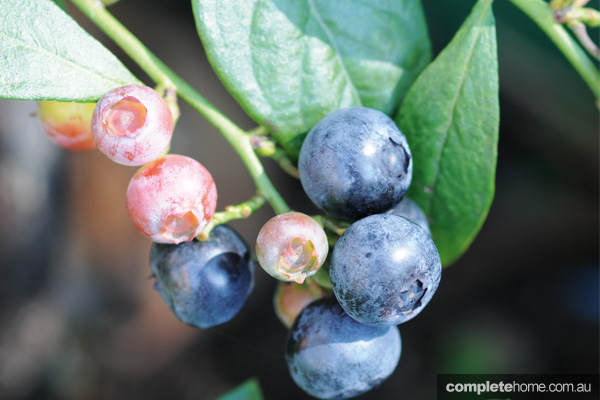
Berries
Raspberries and other Rubus berries (the ones with the fleshy, bumpy bits on them) as well as blueberries are particularly expensive because they are a highly labour-intensive crop to grow commercially. Strawberries can also be a pricey purchase if demand outstrips supply or you’re after organically grown fruit.
Although I’m yet to enjoy huge blueberry harvests from my little plants, I’ve had great success growing strawberries, raspberries and loganberries. The cane-growing raspberries, blackberries and loganberries are particularly economical crops to grow at home — trained vertically along a fence or trellis, they don’t take up much space.
When choosing raspberry varieties, look for those that are dual cropping, meaning they produce a big crop in summer and then a secondary, smaller crop in autumn.
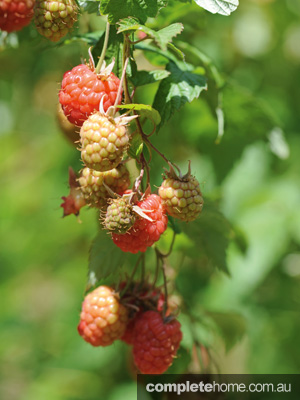
Probably the best advantage of growing your own berry fruit is the huge array of varieties you can choose from, many of which aren’t commercially viable to grow because they have a softer fruit that doesn’t pack and transport well. Often, however, these softer, small fruits have the best flavour and you may find not many ripe berries make it back to the house.
Among my favourite varieties are:
• Chandler, a strawberry that produces lots of large (up to 60g) deep-red fruit that is oh, so sweet.
• Cambridge Rival, a super-sweet, English heirloom variety of strawberry with an intense flavour and a lovely, glossy red fruit.
• Hokowase, an intensely sweet, soft strawberry, perfect for picking and eating straight from the patch.
• Willamette, a dark-red raspberry when ripe and a succulent, dual-cropping plant.
• Autumn Bliss raspberry, another dual-cropping variety that produces large, beautifully sweet fruit.
• Thornless loganberry, a great one for pain-free picking, is a tasty cross between raspberry and blackberry. Utterly delicious!
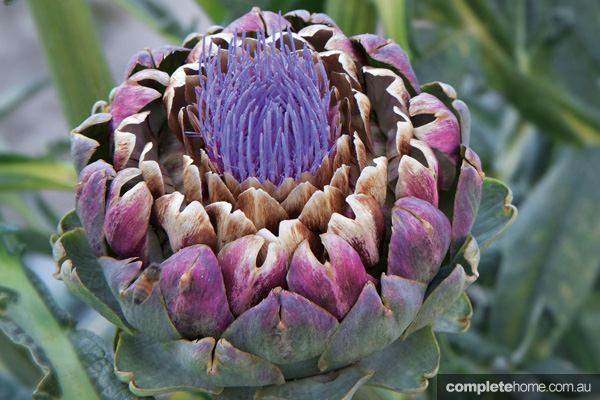
Globe artichoke
At around $2 an artichoke, loving these thistle family members can be an expensive habit. Yet they’re as easy to grow as their weedy relatives and, with one plant producing 6–8 buds in its first year and loads more over the following 2–5 years, it makes sense to grow your own.
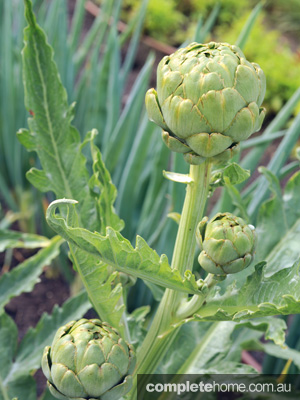
Artichokes are perennials that can be grown from seed or seedlings. To save more pennies and guarantee a tried and trusted variety, ask your neighbours, friends or family if they have some productive plants you could cut side shoots from in autumn. Plant artichoke in spring and autumn in a full-sun position, in moist soil enriched with well-rotted manure or compost. By the following spring you will be harvesting fat, juicy buds — but don’t let them get too big or open as they’ll go tough.
Originally in Good Organic Gardening, Volume 5, No. 3