If you’ve been looking for a way to make an instant organic garden, here’s how to create a tiny flourishing garden in just 15 minutes
This is a simple way to make a tiny herb or vegetable garden for yourself, or create a green and gorgeous gardening gift for someone who has limited space. This garden-in-a-bag will flourish for 12 months to two years.
I have also created a recycled timber tray on which to sit your garden-in-a-bag. This gives the bag stability and allows you to move it easily. If you are unable to make a tray, you can always use a timber bathroom mat or recycled bread delivery tray to hold the potting mix bag.

Materials:
for Timber tray
- 2 × 64cm lengths of timber
- 3 × 42cm lengths of timber
- (I used old floorboards)
- Drill and screws or hammer
- and nails
- Exterior timber varnish or decking oil and brush
for Garden-in-a-bag
- Scissors, trowel and watering can
- 1 bag organic potting mix
- 5 herbs or vegetables
- Organic liquid fertiliser such as Searles Seamax or 5in1
- and nails
- Exterior timber varnish or decking oil and brush

Making your timber tray:
1. Cut the timbers to length.
2. Screw or nail the 3 shorter pieces evenly along the length of the two longer pieces
3. Ensure you’ve squared up the edges and that no nails or screws poke out to tear the potting mix bag.
4. Seal the timber with decking oil or exterior varnish to prevent it rotting. Allow it to dry before putting the bag on top.

Making your garden-in-a-bag:
1. Poke five holes into one side of the bag. Turn the bag over and place it on the tray.
2. Cut five crosses into the bag — one in the middle and one towards each corner. Tuck the cut edges into the bag to make five neat square holes.
3. Prevent any inhalation of potting mix and risk for Legionnaires’ disease by watering the potting mix before you start working with it. I have watered in about 5L of diluted liquid fertiliser. Soak your plants to completely wet the root ball.
4. Remove enough soil from each hole to accommodate a plant.
5. Firm in extra soil around the plant. Repeat with the other plants.
6. Water in each plant with diluted fertiliser. This settles the potting mix around the roots.
7. Wipe the bag clean and your instant garden-in-a-bag is ready to grow. Position in a sunny spot.
Maintaining your garden-in-a-bag
Water a few times a week to keep the soil moist. Fortnightly application of liquid feed to the soil and a spray of the same fertiliser to the foliage will promote luxurious growth.
Garden ideas:
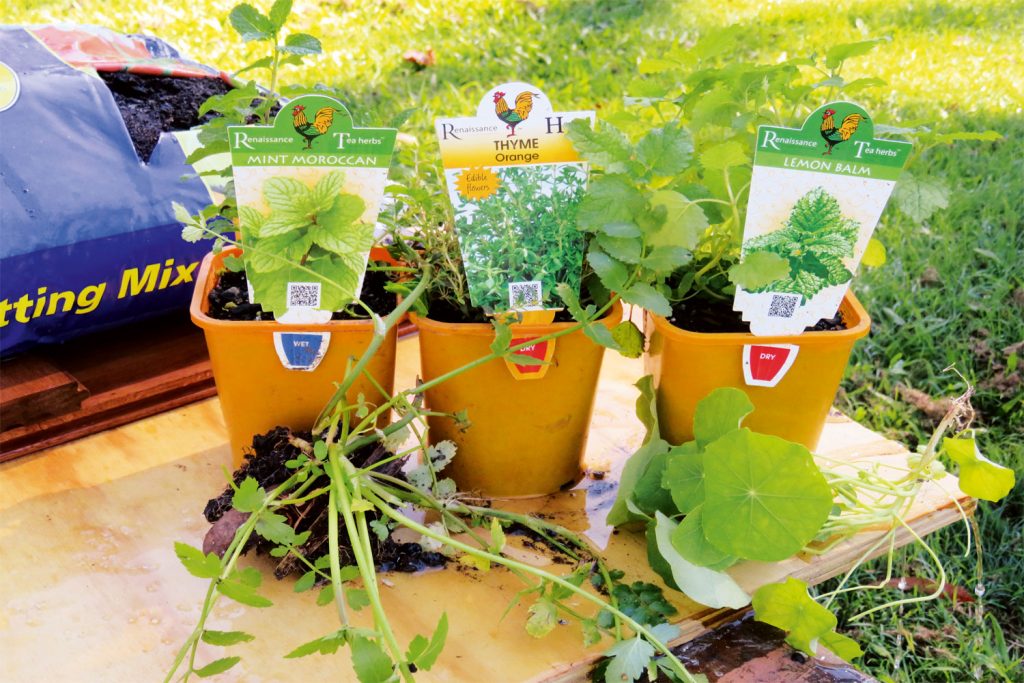
- A herb garden like the one shown has Lebanese cress, mint, thyme, lemon balm and edible nasturtiums.
- An Asian herb garden could include Vietnamese mint, chives, Thai basil, chillies and coriander.
- An Mediterranean herb garden could include oregano, thyme, rosemary, parsley and Greek basil.
- A vegie garden could have a selection of vegetables such as cherry tomatoes, tatsoi, pak choy, lettuce, broccolini, mini cauliflower, bush beans and fairy eggplant. The bag can be replanted after each vegetable is harvested. Simply remove any remaining root ball and add a little pelletised fertiliser to the holes before replanting.
Linda Brennan can be found at ecobotanica.com.au
Written by Linda Brennan
Originally in Good Organic Gardening Volume 8 Issue 3