With the environment becoming an increasingly more concerning issue for new home builders, using environmentally low-impact building materials such as mud bricks has transformed sustainable housing design.

At a young age, I came to understand how different materials affected the living conditions inside a home during the day and night. Spending some time staying in a mud-brick homestead made me aware of a material that is ageless.
That first experience I had of a mud-brick building was when I visited a relative’s sheep station near Gunnedah in New South Wales. It was during the drought of the early 1960s; outside it was a hot, dry summer’s day with temperatures in the 40s, yet the interior was a cool low-20s.
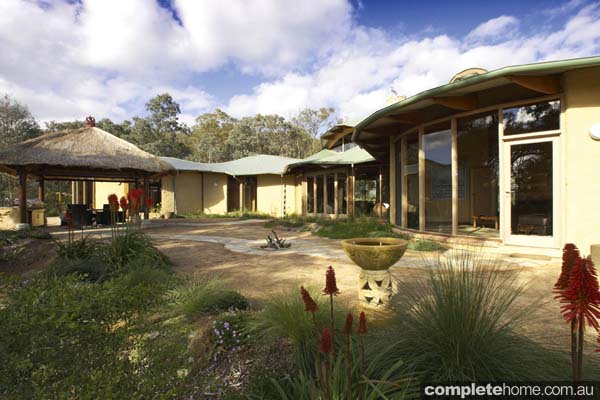
It was a large, rambling homestead (over 400m2) with 3.0m-wide verandahs to its perimeter and thick walls constructed of mud brick. Compare this to where I lived in Tamworth, in an uninsulated timber home with a tiled roof, where temperatures inside approached those of the outside and where at night it never seemed to cool down enough to prepare the home for the next hot day.
Mud bricks were used as a building material as far back as 3300 BCE, probably earlier. An excellent example from the 11th century BCE, found in Arg-e Bam at the southern edge of the Iranian high plateau, an oasis at the crossroads of important trade routes. It suffered major earthquake damage in 2003, but until then the city had remained intact.
Making mud bricks
The earth is mixed with water and a binding material, such as straw or many other similar materials. The straw binds the mud together, reduces cracking and adds strength. If the earth is not perfectly suitable for the manufacture of the bricks, a stabilising agent is used. The most common is cement, which gives it additional strength, resistance to erosion from weather and water resistance.
Mud bricks contain 30 to 70 per cent clay, with silt, sand and small stones making up the rest of the earth mix. Councils require you to have the material approved for use in making bricks. This usually involves an erosion test on a dry brick.
It’s important to plan your site so there is easy access for mixing, forming and drying your bricks. Choose an area for making your bricks that will minimise the distance to where they will be built into the walls.
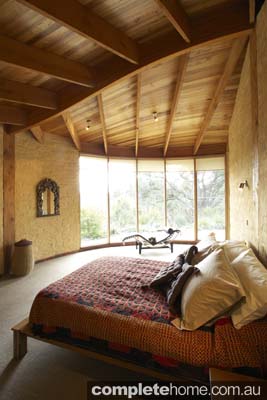
The ideal width of a mud brick is 250mm to 300mm, which gives an effective thermal mass. The weight of the bricks will also determine the size and the ease of layering them. If you make them too large, not only will your building work be harder but it will take longer to dry and also lead to cracking in the bricks. If you wish to create thicker walls, you could build a cavity wall. The bricks are laid in a traditional stretcher bond, as you would if laying fired-clay bricks.
You can make the bricks using a single- or multiple-frame brick mould that you either construct yourself or purchase. Doing it this way involves minimal cost in materials but it will take longer to manufacture all your mud bricks. You’ll need a minimum of 3000 bricks for an average home. Another option is to hire a mud-brick machine, which can turn out 2000 bricks a day. To achieve this, though, you will require the help of several people. It’s important to use what is appropriate for your needs, be it budget or time for construction.
It’s also very important when manufacturing your mud bricks to make sure you have a suitably sized, raised flat area that can be kept dry from rain run-off, and you’ll need good-sized covers to protect your bricks in case of rain.
Building your mud-brick home
You have a few options when building with mud brick:
- Build a pier-and-beam construction with infill mud-brick walls. With this construction method the mud bricks are not load bearing.
- Build a brick veneer, which is the same as a more conventional home where the building structure is supported on a timber or steel frame.
- Construct load-bearing walls, where all the roof loads are supported on the mud-brick walls. This requires a lot more thought in the layout of your walls and you need to define which walls are to be load bearing and non-load bearing.
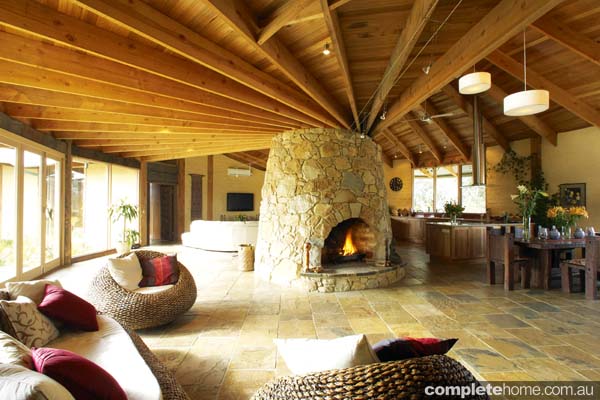
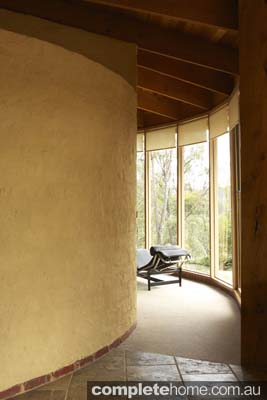
The bonding of the brick is the same material that the wall is constructed from: a thick layer of mud, which when dried can make it difficult to distinguish the joints from the bricks.
If your design is more elaborate, it could include all three types of construction. As with everything in building, your choices will come back to budget and construction time frames.
Things to consider
First things first. Any structure needs a good foundation and appropriately designed footings to support the walls; those footings would be constructed from reinforced concrete.
The next consideration is to provide a barrier or plinth to stop any moisture from penetrating the base of the mud-brick walls. If this is not done correctly, it will affect the integrity of the walls — not just those exposed to weather but also those of the internal wet areas, including bathrooms, laundry, toilet and kitchen. It’s important to protect all walls from moisture, as it is for any wet area in any structural wall system.
If you are building in a remote area where you don’t have easy access to concrete, you could use a masonry footing constructed from local materials that would provide an appropriate footing for support and act as a barrier from moisture. Be aware, though, that alternate methods of footing construction might stretch the inclination of councils to approve the construction. Then again, I have always liked a challenge and having a council approve a structure that is outside the norm paves the way for others to follow in your footsteps.
If the mud-brick walls are to be load bearing, you need to consider how you are going to transfer loads over window and door openings. Appropriately designed support framing will have to transfer loads back to your footings. Because of mud brick’s relatively poor strength, fixing into the walls can be resolved by embedding 20mm- to 30mm-diameter timber dowel in the walls, then fixing into the dowel. This method was used long before plastic plugs and anchor bolts became available for fixing to walls.
Final finishes
The choice of finish is as varied as with any other masonry wall, or the walls can simply be rendered internally and externally with the same material the bricks are made from. Externally, you need to take into account weather exposure, so it’s a good idea to minimise extended wetting by rain. But, as you see from the photos of ancient structures that have been around for thousands of years, these issues are minimal. To repair a wall, you render it with more mud. It’s that simple.
As a last precaution, use linseed oil and turpentine to create a final finish. This is a very effective method of protecting walls that are susceptible to erosion. It also stops the creation of dust from the walls. There is also the option of making a mud and manure slurry, though this is seldom used in Australia.
Finishes can range from rustic to smooth, which adds to the flexibility that is typical of this material with its many appealing qualities.
Insulation
Mud brick is excellent for thermal mass but, like any masonry, a very poor insulator. How you approach the requirement for insulation, and the type you choose, will depend on what climatic zone your home is being built in and could also affect the construction method you use.
Sound and fire-proofing
These are two areas where mud brick performs very well. Sound-proofing works best with all dense masonry material. In fact, mud brick can be almost equivalent to a monolithic masonry structure in its capacity for sound attenuation but, as with any structure, sound-proofing is affected by the number and size of the penetrations in a solid wall. If sound-proofing is an issue, you should include sound insulation in roof spaces.
In terms of fire resistance, as shown by the bushfires in Victoria, mud bricks performed very well where structures typically had walls 250mm thick with a four-hour fire rating. In Australia, the requirement in bushfire-prone areas is 1.5 hours.
Building any structure requires planning and attention to detail. This will minimise problems and help maintain your budget and program during construction. If you don’t have the confidence to do this yourself, it might be easier to employ a suitably qualified builder who has built a number of mud-brick homes, or a project manager to assist you in the construction of your dream home from the ground up.
Images courtesy Wayne Lascelles Architect
By Ian Cleland
From Grand Designs Australia magazine Vol. 2 No. 2